Setting Up Reservation Service (Domain Specific API)
Introduction
Huff! Finally, five services later, now we’re ready to write the actual meat (aka domain specific business logic) of our application.
Basically, our application is just a simple CRUD application to manage reservations. Nothing fancy, we’ll use spring-data to do most of the heavy lifting configuration and boilerplate for us. We use in memory H2 for our database for this tutorial’s simplicity sake. In reality, you can plug almost any popular SQL or even NoSQL databases to spring-data.
In addition, for fail-safe write, we will use spring-cloud-stream to manage our message-driven interaction. Again, even though we use kafka for this tutorial, there’s nothing stopping you to use other popular message brokers (e.g. RabbitMQ)
Setting up Reservation Service’s Configuration
In the existing config’s git:
vim reservation-service.properties

### Add the below to reservation-service.properties
server.port=${PORT:8000}
message=Hello World!

# define the destination to which the input MessageChannel should be bound
spring.cloud.stream.bindings.input.destination=reservations

# ensures 1 node in a group gets message (point-to-point, not a broadcast)
spring.cloud.stream.bindings.input.group=reservations-group

# ensure that the Q is durable
spring.cloud.stream.bindings.input.durableSubscription=true

# To avoid sending zipkin spans/ traces via kafka
spring.zipkin.sender.type=web
## End of reservation-service.properties

git add reservation-service.properties
git commit -m "Add reservation-service.properties"
Setting up Reservation Service
-
Go to https://start.spring.io/
-
Type
reservation-serviceas the “Artifact” name, addWeb,JPA,Actuator,H2,Config Client,Eureka Discovery,Lombok,Zipkin Client,Stream Kafkadependencies, and “Generate Project”:
-
Open the project in your favorite Java IDE (mine is IntelliJ)
-
Create a simple entity
ReservationwithidandreservationNameand furnish it with the below JPA and Lombok annotations:package com.example.reservationservice; import lombok.AllArgsConstructor; import lombok.Data; import lombok.NoArgsConstructor; import javax.persistence.Entity; import javax.persistence.GeneratedValue; import javax.persistence.Id; @Entity @Data @NoArgsConstructor @AllArgsConstructor public class Reservation { @Id @GeneratedValue private Long id; private String reservationName; }NOTE: If you use IntelliJ, you will need to do the below for Lombok to work seamlessly:
- Install the Lombok plugin
- Enable Annotation Processing documentation
-
Create a corresponding
JpaRepositoryfor the above entity, name itReservationRepository:package com.example.reservationservice; import org.springframework.data.jpa.repository.JpaRepository; import java.util.Collection; public interface ReservationRepository extends JpaRepository<Reservation, Long> { Collection<Reservation> findByReservationName(String reservationName); } -
Create a
@RestControllerto access our reservations, name itReservationRestController:package com.example.reservationservice; import org.springframework.beans.factory.annotation.Autowired; import org.springframework.web.bind.annotation.GetMapping; import org.springframework.web.bind.annotation.RestController; import java.util.Collection; @RestController public class ReservationRestController { private ReservationRepository reservationRepository; @Autowired ReservationRestController(ReservationRepository reservationRepository) { this.reservationRepository = reservationRepository; } @GetMapping("/reservations") Collection<Reservation> reservations() { return this.reservationRepository.findAll(); } } -
For the “write” part of service, we want to use an input channel named
inputdeclared inReservationChannelsinterface:package com.example.reservationservice; import org.springframework.cloud.stream.annotation.Input; import org.springframework.messaging.SubscribableChannel; public interface ReservationChannels { @Input SubscribableChannel input(); } -
Next, we define a processor (
MessageEndpoint) for which is activated upon an incoming messsage from theinputchannel:package com.example.reservationservice; import org.springframework.beans.factory.annotation.Autowired; import org.springframework.integration.annotation.MessageEndpoint; import org.springframework.integration.annotation.ServiceActivator; import org.springframework.messaging.Message; @MessageEndpoint public class ReservationProcessor { private ReservationRepository reservationRepository; @Autowired public ReservationProcessor(ReservationRepository reservationRepository) { this.reservationRepository = reservationRepository; } @ServiceActivator(inputChannel = "input") public void acceptNewReservation(Message<String> msg) { reservationRepository.save(new Reservation(null,msg.getPayload())); } } -
Our beans are ready. Next we need to annotate
@EnableDiscoveryClientand@EnableBindingsonReservationChannelsonto our main classReservationServiceApplication:package com.example.reservationservice; import org.springframework.boot.SpringApplication; import org.springframework.boot.autoconfigure.SpringBootApplication; import org.springframework.cloud.client.discovery.EnableDiscoveryClient; import org.springframework.cloud.stream.annotation.EnableBinding; @SpringBootApplication @EnableDiscoveryClient @EnableBinding(ReservationChannels.class) public class ReservationServiceApplication { public static void main(String[] args) { SpringApplication.run(ReservationServiceApplication.class, args); } } -
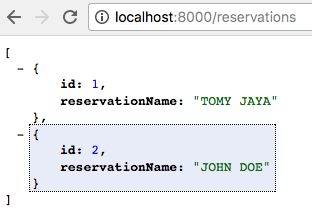
Finally, create a
@Componentwhich implementsCommandLineRunnerto pre-populate our in-memory database on startup:package com.example.reservationservice; import org.springframework.beans.factory.annotation.Autowired; import org.springframework.boot.CommandLineRunner; import org.springframework.stereotype.Component; import java.util.stream.Stream; @Component public class SampleDataClr implements CommandLineRunner { private ReservationRepository reservationRepository; @Autowired public SampleDataClr(ReservationRepository reservationRepository) { this.reservationRepository = reservationRepository; } @Override public void run(String... strings) throws Exception { Stream.of("TOMY JAYA", "JOHN DOE").forEach(name -> { reservationRepository.save(new Reservation(null, name)); }); } } -
in
src/main/resources, create a new file calledbootstrap.properties, add the below:# tell config service what is the name of the service and corresponding config to retrieve spring.application.name=reservation-service # tell the location the location of config server spring.cloud.config.uri=http://localhost:8888 -
Run
ReservationServiceApplicationand voila! Yourreservation-serviceis started! -
Go to http://localhost:8000/reservations to see the list of reservations.
-
Since we configure
spring-boot-actuatoron this service, we can monitor some production metrics exposed from several HTTP endpoints.But to be able see Actuator’s sensitive endpoints, we need to disable spring security by adding the below into
application.propertiesinsrc/main/resources:management.security.enabled=falseRestart
ReservationServiceApplicationand try to access http://localhost:8000/metrics for some useful stats about your microservice: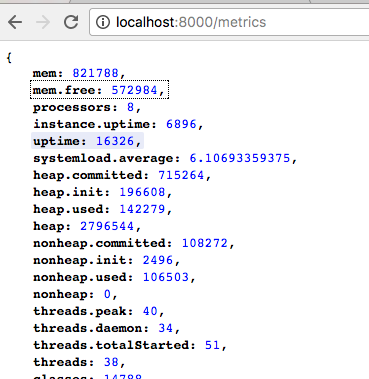
Other actuator endpoints I found useful are:
Endpoint Use http://localhost:8000/env list all properties http://localhost:8000/beans list all the available Spring beans http://localhost:8000/trace trace the last 100 HTTP requests info http://localhost:8000/mappings This one is a gem! It lists all the HTTP endpoint paths & corresponding handlers http://localhost:8000/health Tell if it’s UP or DOWN http://localhost:8000/info You can inject custom indicator here Let’s try to create a custom info indicator:
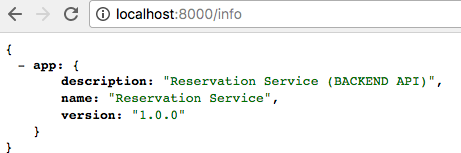
 info.app.name=Reservation Service

 info.app.description=Reservation Service (BACKEND API)

 info.app.version=1.0.0
Let’s try to create a custom health indicator:
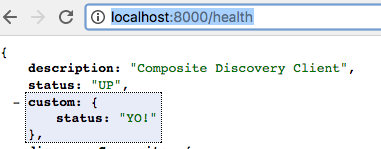
 package com.example.reservationservice;

 import org.springframework.boot.actuate.health.Health;
 import org.springframework.boot.actuate.health.HealthIndicator;
 import org.springframework.stereotype.Component;

 @Component
 public class CustomHealthIndicator implements HealthIndicator {
     @Override
     public Health health() {
         return Health.status("YO!").build();
     }
 }
Restart and try to access http://localhost:8000/info:
And in http://localhost:8000/health, you should see:
Conclusion:
We have now set up our production ready Reservation Service which can read & write reservations stored in an H2 database.
We haven’t tested the write yet, though, as it requires our reservation-client to push the message to our subscribed input channel. Let’s do that in the next post.
Other Useful references:
Next Up
Setting Up Reservation Client (Edge Service)